“You want fresh food in February. You also want to avoid going to the store, eating pickled beets for the third week in a row, or crying into your frostbitten kale.”
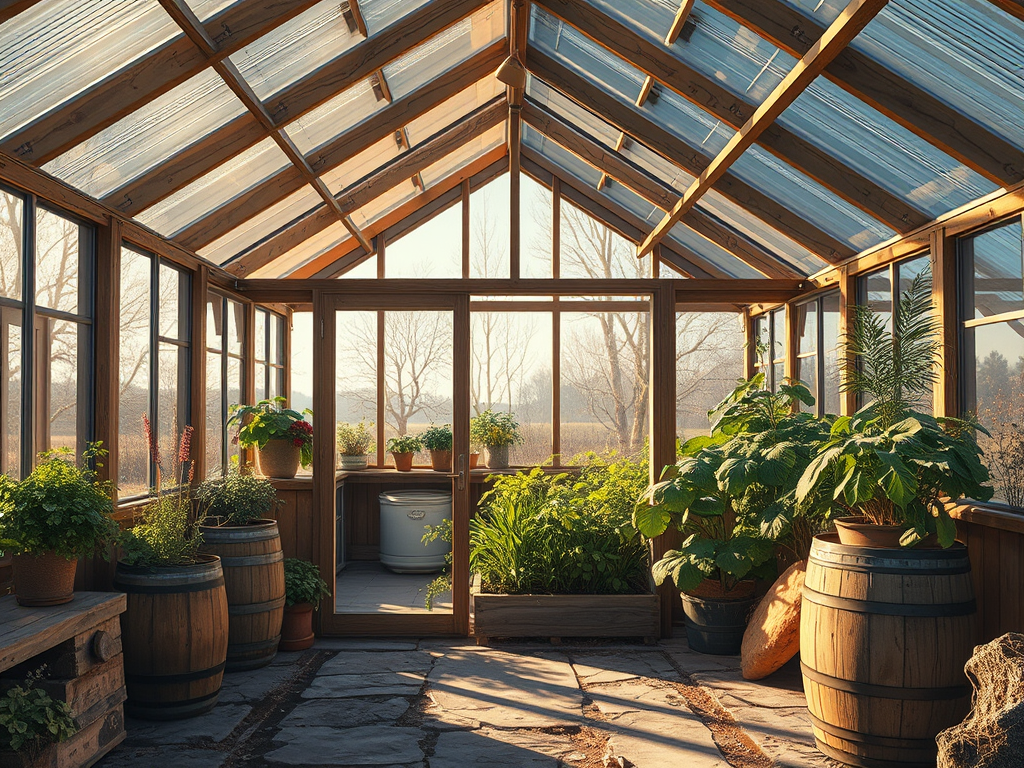
A passive solar greenhouse is the holy grail of off-grid smugness: year-round food, minimal inputs, and the chance to say things like, “my tomatoes overwintered naturally.” Here’s how to build one without engineering a frost-covered coffin for your basil.
🧭 Step 1: Pick the Right Spot (The Sun Has Opinions)
You want:
- South-facing (in the northern hemisphere) = max sunlight
- Slope or windbreak protection
- No massive trees or structures that block sun after 2pm
- Easy access from your cabin (you’re not hiking through snow at 6am for lettuce)
Bad spots:
- North-facing slopes = arctic wasteland
- Low valleys = frost pockets and mosquito rave zones
🪵 Step 2: Choose Materials That Don’t Suck
Frame:
- Wood: Cheap, insulative, DIY-friendly. Treat it or watch it rot faster than your willpower.
- Metal: Stronger, lasts longer, may rust. Looks more “apocalypse bunker.”
Glazing (the transparent part):
- Double-wall polycarbonate: Light, strong, insulates. Pricey, but worth it.
- Glass: Pretty, heavy, breaks. Basically Instagram bait.
- Plastic sheeting: Cheap. Tears in the wind. Looks like you live in a garden trash bag.
Use glazing on south wall + roof, insulate north, east, and west with something like:
- Straw bales
- Earth berm
- Foam panels
- Spare shame from previous projects
🌡️ Step 3: Insulation + Thermal Mass = Your Plant Life Insurance
Greenhouses overheat by day and freeze at night unless you design for temperature moderation.
Add Thermal Mass:
- Barrels of water = soak up heat by day, release at night
- Stone or concrete floors = same deal, plus very dramatic
- Dark-colored bricks or tiles = heat hoarders
Put mass near sun-facing walls. Don’t block all your light trying to be clever.
Insulation:
- Bubble wrap on windows (yes, really)
- Thermal curtains
- Bury part of the greenhouse to trap warmth
- Build partially underground if you’re feeling Hobbit-adjacent
🌬️ Step 4: Airflow or Die
Without airflow, you get mold, rot, and a mushroom rave in your cabbage patch.
Install:
- Vents (high + low) = hot air out, cool air in
- Windows that open = wow, revolutionary
- Passive chimneys or convection vents = natural heat movement
- Fans (solar-powered if off-grid) for bonus points
If you see condensation dripping off your kale, it’s time to intervene.
🥬 Step 5: Plan the Inside Like You Have a Brain
Zones:
- Tall crops in back (north side)
- Short ones up front
- Walkway wide enough for tools (and existential pacing)
- Shelving = great, but don’t shade your stuff
Don’t Forget:
- Water source: gravity-fed rain barrel, hose, watering can, crying
- Thermometer/hygrometer = data you’ll ignore until something dies
- Pest plan: screen vents, sticky traps, maybe a lazy cat
❄️ Step 6: Winter-Proof It or Regret Everything
Snow will destroy your dreams if:
- Your roof slope is too shallow
- You used plastic sheeting held on by duct tape
- You didn’t reinforce your frame
Design for:
- Snow load in your area
- High wind resilience
- 3 a.m. regrets when it’s -10°F and your structure starts to creak
Also: keep a snow brush nearby unless you love watching panels collapse dramatically.
Final Thought
A passive solar greenhouse isn’t just a project—it’s a commitment to year-round productivity and semi-controlled chaos. Build it well, and you’ll eat greens while your neighbors chew on sadness and crackers.
Mess it up, and you’ve built a tropical death trap with bonus humidity and frost damage.
Either way, you’ll learn something. Probably the hard way.

Leave a comment